 Call Toll Free: 1-833-ART-TILE

Installation Guidelines
Installation Guidelines
Everything you need know about Maison Surface’s
installation guidelines and maintenance.
Please inspect your tile before installation. Open each box to verify that your order is complete, the correct product was received, and the color is consistent from sheet to sheet. If you notice any issues, contact us immediately before installing.
Because natural stone is a product of nature, variations in color, shade, veining, and texture are normal and should be expected. These natural characteristics are not considered defects. Once the tile has been installed, claims related to these natural variations cannot be accepted.
If you require additional material, wait until you have received all pieces before beginning installation, as future shipments may vary slightly in color or veining.
Before installing, dry-lay all of the mosaic sheets and rearrange them as needed to achieve your desired overall appearance.
Step 1
Step 1: Prepare the Surface
A successful installation starts with a clean, flat, and stable surface.
- Ensure the installation surface is smooth, level, dry, and free of dust or debris.
- For floors, install cement backer board over a properly prepared plywood subfloor.
- For walls, install cement backer board directly to wall studs when appropriate.
Step 2
Step 2: Plan Your Layout
Before applying adhesive, dry-lay all mosaic sheets.
- Arrange the sheets to confirm the pattern, color distribution, and placement.
- Make any adjustments until you are satisfied with the overall appearance.
- Once finalized, keep the sheets in order to make installation easier.
Step 3
Step 3: Cut to Fit
Measure and trim any mosaic sheets needed for edges, corners, outlets, or fixtures before installing whenever possible.
Pre-cutting pieces helps the installation go more smoothly and reduces interruptions during the setting process.
Step 4
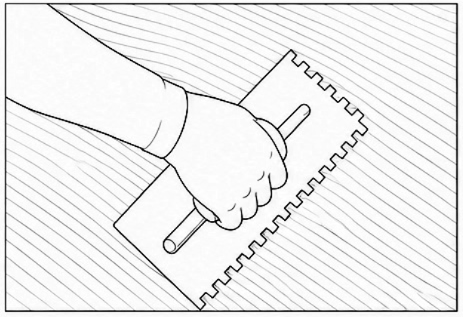
Step 4: Apply Thin-Set Mortar
Using the trowel size recommended by your mortar and tile manufacturer:
- Spread a thin, even layer of thin-set mortar with the flat side of the trowel.
- Comb the mortar using the notched side, working in sections approximately 2–3 ft. (60–90 cm) at a time.
- The ridges should be uniform, and the substrate should still be visible between the grooves. Avoid applying more mortar than can be covered before it begins to skin over.
Step 5
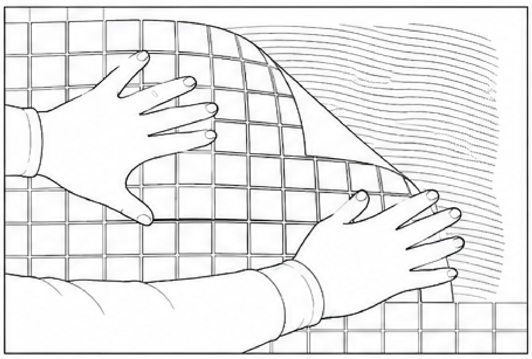
Step 5: Install the Mosaic Sheets
- Press each sheet firmly into the mortar using even pressure.
- Use a grout float or beating block to gently flatten the sheet and ensure full contact with the mortar.
- Check that grout joints align evenly between sheets.
- Periodically lift a sheet to verify proper mortar coverage before continuing.
- Remove excess mortar from the joints before it hardens.
Allow the installation to cure for 24–48 hours, or as recommended by the mortar manufacturer.
Step 6
Step 6: Grout Selection
Select the grout appropriate for your joint width.
- Unsanded grout: Joints 1/8 in. (3 mm) or smaller.
- Sanded grout: Joints larger than 1/8 in. (3 mm).
- Epoxy grout: Excellent for wet areas and stain resistance; follow the manufacturer’s installation instructions.
Step 7
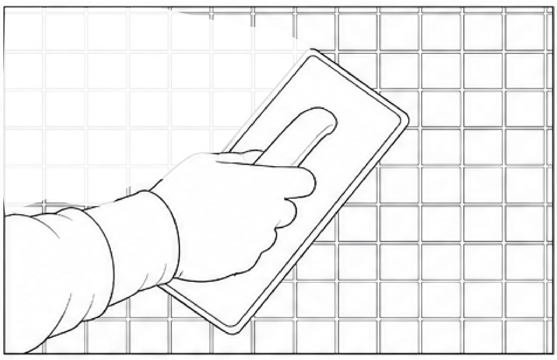
Step 7: Apply the Grout
- Mix the grout according to the manufacturer’s instructions.
- Using a rubber grout float held at a 45-degree angle, spread grout across the tile surface.
- Work diagonally across the joints to completely fill all grout lines.
- Make multiple passes from different directions to eliminate air pockets.
- Remove excess grout from the tile surface using the edge of the float.
Step 8
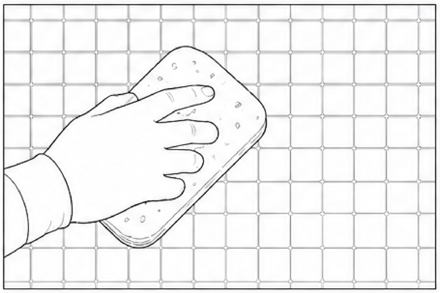
Step 8: Cleaning
When the grout begins to firm up (follow the grout manufacturer’s timing recommendations):
- Wipe the tile surface with a damp sponge using light, diagonal strokes.
- Rinse the sponge frequently using clean water.
- Change the rinse water often to prevent grout haze.
- After the grout has cured, buff away any remaining haze with a clean, dry microfiber cloth.
Allow the grout to fully cure according to the manufacturer’s instructions before exposing the installation to moisture.
Step 9
Step 9: Seal the Grout (If Required)
Some cement-based grouts require sealing, while many modern grouts—including most epoxy grouts—do not.
- Always follow the grout manufacturer’s recommendations.
- Sealing is especially important in wet environments such as showers if using a grout that requires it.
- Apply sealer evenly and wipe any excess from the tile surface immediately.
- Reapply sealer as recommended by the manufacturer, typically every 1–2 years when applicable.
Proper grout maintenance helps protect against moisture penetration, staining, mold, and mildew.
Maison Installation Guide
Maison Installation Guide
Disclaimers
Acknowledgment
Stone is a product of nature and no two pieces are exactly alike. Each piece of stone has unique characteristics that include, but are not limited to: color variation, shading differences, fissures, pits, veining, and fossils, none of which are defects, rather they are inherent characteristics of natural stone. Please take steps to ensure proper blending prior to installation.
All goods must be inspected by customer before acceptance. Your receipt of any goods shall be an unqualified acceptance of and a waiver of any and all claims not made in writing within seven (7) business days after such receipt. No returns will be accepted without written consent. We do not accept returns on special or custom orders, or on opened cartons.
Defect of part of the merchandise shall not be grounds for your rejection of all of such merchandise, or for all of the particular item in which such defect is found, nor shall be it grounds for the cancellation of any undelivered portions of your order. Maison Surface recommends obtaining physical samples or range photos from the current lot available prior to your order. Installation constitutes acceptance.
Sealing
Sealing is an essential step in protecting the beauty and ensuring the longevity of any Maison Surface natural stone product. We recommend sealing all natural stone products with a penetrating sealer.
In addition, we recommend sealing all porous non-polished stones (limestones, tumbled marble, etc.) prior to grouting. This prevents grout from staining or affecting the color of the stone.
As part of a normal maintenance procedure, all Maison natural stone products require re-sealing on a regular basis. Please consult the manufacturer of your sealer product to find out the time frame for re-sealing based on traffic patterns and use.
Cleaning
Stone is a natural product, and care should be taken to protect it from harsh abrasive cleaners and abrasive cleaning tools. Many manufacturers make products formulated specifically for stone care. A word of caution: Take care to avoid “over the counter” stone care sprays that contain phosphoric and glycolic acids, that could etch some polished stone surfaces. Please ask for further assistance in selecting the appropriate product to care for your stone tiles.
Cleaning
note- Material should be installed by pulling from ALL crates or boxes to ensure optimal blending of shade variation.
WARNING: It is the responsibility of the customer to ensure that the mosaic is complete and correct, and that the colors blend properly to meet expectations. Any concerns should be addressed prior to installation. It is our strict policy that installation constitutes acceptance.
